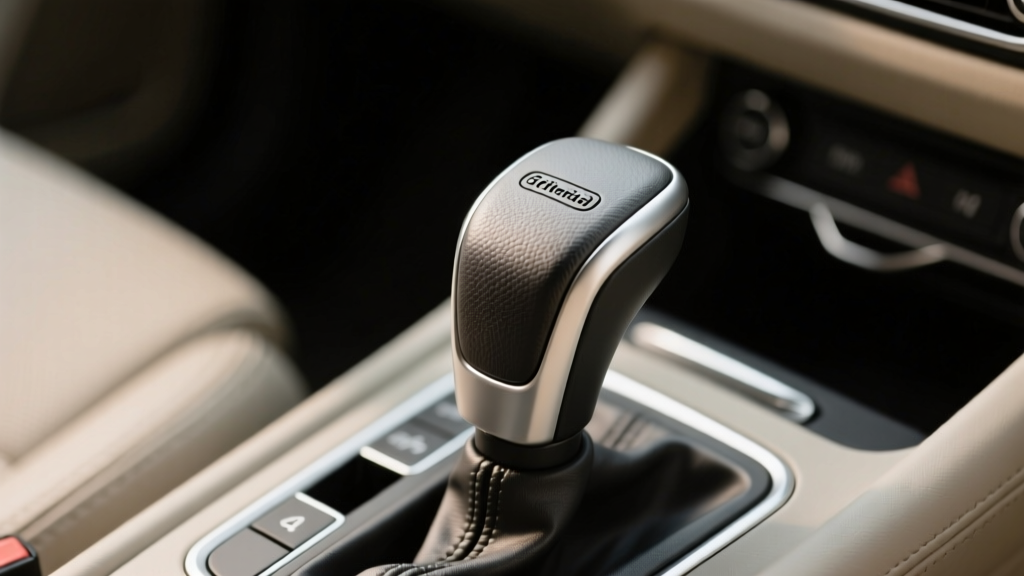
Commercial Vehicle Gear Shift Cover Installation
Commercial vehicles work hard, and the cabin takes a beating right alongside the drivetrain. One of the most handled parts of any truck, van, or work rig is the gear shift area?whether that?s a manual stick, an automatic column shifter, a floor-mounted selector, or a heavy-duty cable shifter on specialty equipment. Over time, oils, dust, UV exposure, and constant hand contact can leave the shift boot or gear shift cover cracked, loose, or just unpleasant to touch.
Replacing or upgrading a commercial vehicle gear shift cover is a small interior project that pays off fast. A well-fitted cover improves grip, cabin cleanliness, and driver comfort?especially on long routes. It can also help keep debris out of the shifter mechanism and prevent accelerated wear in the surrounding trim. If you?re managing a fleet, it?s a low-cost refresh that drivers actually notice.
This guide walks you through choosing the right shift cover, removing the old one, installing the new cover cleanly, and avoiding the common mistakes that cause rattles, tears, or a sloppy fit. The goal: a professional-looking result you?d expect from an upfit shop?done in your own bay or driveway.
What Counts as a ?Gear Shift Cover? in Commercial Vehicles?
Depending on your vehicle, ?gear shift cover? might refer to one of these:
- Shift boot (manual): The flexible boot sealing the shifter opening in the floor, usually with a trim ring.
- Shift knob cover/sleeve: A leather, vinyl, or rubber wrap that improves grip and appearance on the knob itself.
- Column shifter cover: A protective sleeve or trim cover around a column-mounted selector on vans and some trucks.
- Console/selector trim cover (automatic): A bezel or protective overlay around the PRNDL selector area.
- Dust cover: On certain vocational vehicles (box trucks, buses, off-road commercial equipment), a protective cover that prioritizes sealing and durability.
This installation guide focuses mainly on manual shift boots and universal or model-specific gear shift covers, since those are the most common ?install and fit? projects. If you?re installing only a knob sleeve, you can skip ahead to the section on knob-style covers.
Why Replace a Worn Shift Cover?
- Improved cabin hygiene: A torn boot is basically a funnel for dust, grit, and spills to reach the shifter opening.
- Better comfort and control: A grippy knob cover reduces hand fatigue and slipping?especially with gloves.
- Reduced noise and drafts: A properly sealed boot can cut down on vibration noise and air movement through the tunnel area.
- Professional appearance: A clean, intact shifter area makes the whole interior look better, which matters for customer-facing businesses.
- Protects components: Keeping debris out helps the shifter linkage area stay cleaner, especially in dusty jobsite conditions.
Choosing the Right Commercial Vehicle Gear Shift Cover
1) Model-Specific vs. Universal Fit
- Model-specific covers fit best, align with factory trim rings, and tend to look OEM. They cost a bit more but save time.
- Universal covers work well when you can?t find an exact match (older trucks, upfitted interiors, swapped transmissions). They often require trimming and careful measurement.
2) Material Options (and What Works Best for Work Rigs)
- Genuine leather: Comfortable and premium, but requires conditioning and can show wear faster in harsh fleet use.
- Synthetic leather (PU): Good value, easy to clean, and consistent appearance. Great for many vans and light-duty trucks.
- Vinyl: Durable and wipe-clean; can get stiff in extreme cold if it?s low quality.
- Rubber or neoprene: Excellent for dusty or wet environments; ideal for off-road commercial use.
- Canvas/ballistic fabric: Tough, utilitarian look; good tear resistance, but not always the best seal without a proper inner liner.
3) Check These Measurements Before You Buy
Grab a tape measure and note:
- Base opening size: The hole in the floor/console and the dimensions of the trim ring or bezel.
- Height: From base to knob area at neutral position (leave slack for shifting range).
- Top opening diameter: Around the shifter shaft below the knob.
- Attachment style: Staples, clips, screws, zip tie channel, elastic band, or sewn collar.
Tools and Supplies You?ll Want On Hand
- Trim removal tools (plastic pry tools reduce scratching)
- Phillips/flathead screwdrivers
- Torx bits (common on newer vans and trucks)
- Needle-nose pliers
- Scissors or a sharp utility knife (for universal boot trimming)
- Isopropyl alcohol and clean microfiber cloths
- Painter?s tape (protects trim edges during removal)
- Zip ties or small hose clamps (for securing the top collar if needed)
- Spray silicone (optional; helps seat rubber collars?use lightly)
Pre-Installation Prep: Safety and Cabin Setup
- Park on a level surface and set the parking brake.
- Transmission in neutral (manual) or park (automatic). For some shifter bezel removals, you may need key-on to shift to a specific position?follow your service manual.
- Disconnect the battery if your console area includes electrical connectors (heated seats, accessory ports, shift interlock wiring). This reduces the chance of triggering warning lights or shorting a connector.
- Clear the area: Remove floor mats and anything in cupholders or console bins so you?re not fighting clutter.
Step-by-Step: Installing a Manual Shift Boot (Most Common Scenario)
Step 1: Remove the Shift Knob (If Required)
Some knobs unscrew counterclockwise. Others are retained by a set screw, clip, or roll pin.
- Check for a hidden set screw under a cap or trim piece.
- If it?s a pull-off style knob, pull straight up with controlled force (avoid face-level positioning?knobs can release suddenly).
- For commercial trucks with heavy knobs, use a towel and firm grip to avoid damaging threads.
Step 2: Remove the Trim Ring or Bezel
- Use a plastic trim tool to gently pry up the boot surround.
- Look for screws at corners or inside small recesses.
- Disconnect any nearby electrical connectors (12V sockets, switches) if the bezel includes them.
Tip: Apply painter?s tape along the edges of surrounding trim to prevent scuffs?especially on glossy or soft-touch surfaces.
Step 3: Detach the Old Boot
Common attachment methods:
- Stapled to a plastic frame: Remove staples carefully with pliers.
- Clipped into a frame: Release tabs evenly to avoid snapping them.
- Glued: Warm gently with a hairdryer and peel slowly.
At the top, the boot may be held with:
- An elastic band
- A zip tie
- A spring clamp
- A sewn-in collar
Step 4: Clean the Mounting Area
Take a few minutes here?this is where ?shop quality? results come from.
- Wipe the frame, bezel, and surrounding console with isopropyl alcohol.
- Remove grit that could cause squeaks or prevent clips from seating.
- Check for cracked trim ring tabs; replace or reinforce if needed.
Step 5: Test-Fit the New Boot
- Slide the boot over the shifter shaft (before securing anything).
- Confirm the boot?s folds (or stitched seams) face the direction you want.
- Move the shifter through all gears with the boot loosely in place.
Real-world example: If you install a boot too ?tight? front-to-back, it may look fine in neutral but pull hard when selecting 2nd, 4th, or reverse. That tension leads to early tearing at the corners of the frame.
Step 6: Secure the Boot to the Top Collar
For boots with a top opening that needs clamping:
- Position the boot so it sits just below the knob mounting point.
- Secure with a zip tie or clamp in the factory groove (if present).
- Trim excess zip tie tail cleanly so it won?t snag.
Tip: Use a black zip tie for a cleaner look. If you?re in a hot climate, choose a high-temperature rated tie to reduce brittleness over time.
Step 7: Attach the Boot to the Frame or Bezel
- Staple-style: Pull the material evenly (not overly tight) and staple opposite sides first, then fill in between.
- Clip-in style: Align the boot?s edge in the channel and press clips in a crisscross pattern.
- Adhesive-style: Apply thin, even adhesive only where needed. Too much glue can seep and create hard spots.
Step 8: Reinstall the Bezel and Knob
- Reconnect any electrical connectors.
- Press the bezel down evenly until all clips seat (you should hear consistent clicks).
- Reinstall screws snugly?avoid over-tightening into plastic.
- Reinstall the knob and verify it?s secure.
Step 9: Function Check
- Shift through all gears with the engine off.
- Check that the boot doesn?t bind, twist, or pull out of the frame.
- Look for gaps around the bezel that could cause rattles.
Step-by-Step: Installing a Gear Shift Knob Cover (Sleeve/Wrap Style)
Knob covers are popular on fleet vans and work trucks because they?re quick, inexpensive, and improve grip.
- Clean the knob with alcohol to remove oils and hand grime.
- Test fit to confirm seam orientation and coverage around buttons (overdrive, tow/haul, shift lock).
- Install:
- Elastic style: Stretch evenly, avoid overstretching one side.
- Laced style: Tighten gradually in stages for an even finish.
- Adhesive-backed: Align once?most adhesives don?t allow repositioning.
- Check operation of any thumb buttons and ensure the cover doesn?t block gear indicators or interlock features.
Product Recommendations: What to Look For (Without Guesswork)
Rather than chasing the ?best? shift cover for everyone, focus on the features that matter for commercial use.
Best for Fleet Durability (Delivery Vans, Service Trucks)
- Material: Heavy-duty vinyl or quality synthetic leather (PU) with reinforced stitching
- Features: Double-stitched seams, thick backing, wipe-clean texture
- Why it works: Handles frequent entry/exit and constant shifting without needing special care
Best for Dusty/Off-Road Job Sites (Construction, Agricultural, Utility)
- Material: Rubber/neoprene boot or sealed fabric with inner liner
- Features: Tight collar fit, strong base frame, water-resistant surface
- Why it works: Prioritizes sealing and tear resistance over appearance
Best OEM-Look Upgrade (Owner-Operators, Customer-Facing Vehicles)
- Material: Leather or premium synthetic leather with molded frame
- Features: Model-specific bezel alignment, clean stitch lines, factory-style grain
- Why it works: Looks right, installs easier, and avoids the ?universal bunching? look
Common Mistakes to Avoid
- Skipping the test-fit: A boot that binds in 1st/3rd/5th will tear early and feel stiff.
- Over-tightening the top collar: Crushing the material can create a weak spot that splits.
- Not cleaning the frame: Dirt under the boot edge causes uneven seating and squeaks.
- Cutting a universal boot too aggressively: Trim in small increments; you can always cut more, but you can?t add material back.
- Forgetting electrical connectors: Forcing a bezel down with a trapped connector can break clips or pinch wires.
- Misaligned seams: A seam that sits where your hand rubs most will wear faster and feel annoying every shift.
Practical Tips for a Cleaner, Longer-Lasting Install
- Match the boot ?slack? to driving reality: Commercial drivers often shift with more force and at wider angles?leave enough material for the full range.
- Use a heat-softening approach carefully: On stiff vinyl boots, gentle warmth helps shaping, but too much heat can warp the frame.
- Prevent future grime buildup: A quick wipe-down at fuel stops keeps oils from breaking down stitching and coatings.
- Listen for rattles immediately: If the bezel isn?t fully clipped, you?ll hear it on rough roads. Fix it now, not after weeks of vibration.
FAQ: Commercial Vehicle Gear Shift Cover Installation
How long does it take to install a gear shift cover?
Most manual shift boot replacements take 30?90 minutes depending on trim complexity and whether the knob must be removed. Knob sleeves can take 5?15 minutes.
Do I need to remove the center console to replace the shift boot?
Usually not. Many vehicles use a bezel/trim ring that pops out from the top. Some vans and trucks with integrated consoles may require loosening a few panels for access, but full console removal is less common.
Will a universal shift boot fit my truck or van?
Often yes, but expect to measure carefully and possibly trim the base opening. Universal boots work best when your original boot attaches to a simple frame and the shifter has a standard shaft diameter.
My boot keeps popping out of the bezel?what causes that?
The usual culprits are misaligned edges, broken bezel clips, or too much tension from a boot that?s too short. Recheck the clip seating and confirm the boot has enough slack during full gear engagement.
Should I use glue to hold the boot in place?
Only if the design calls for it or the frame is missing its retention features. Clips and channels are preferred because glue can make future service harder and may seep through thin material.
Can a worn shift boot cause mechanical shifting problems?
A worn boot usually doesn?t affect the transmission directly, but it can bind the shifter if it?s torn and snagging, or if an incorrectly installed boot is too tight. If shifting feels stiff right after installation, recheck fitment before assuming a mechanical issue.
Wrap-Up: Next Steps for a Pro-Level Result
Start by identifying whether you?re replacing a full shift boot, a knob cover, or a bezel-style gear selector cover, then measure before ordering?especially for universal parts. Take your time with trim removal, clean the mounting surfaces, and always test shifter movement through every gear before locking everything down. A clean install doesn?t just look better; it lasts longer under commercial-duty use.
If you?re ready to keep upgrading your cabin, explore more interior how-to articles and product guides on carinteriormix.com?we?re building a library to help you get durable, driver-friendly results on every vehicle you run.